How to Dye a Faded Slipcover with Rit Dye
When we first furnished our rental house on St. Simons Island about five years ago, I ordered a couch that seemed like it would work well in the space. Unfortunately, once it arrived, I realized the upholstery fabric probably wasn’t going to be very practical for a vacation rental.
Between renters, beach sand, and dogs coming home after a day near the water, I wanted something that could take a lot more abuse — and, most importantly, something I could wash.
So I made a slipcover for the entire couch out of blue denim.
That turned out to be a very good decision. The denim has held up remarkably well over the years, and being able to remove and wash the covers has made the couch much more practical for a rental house.
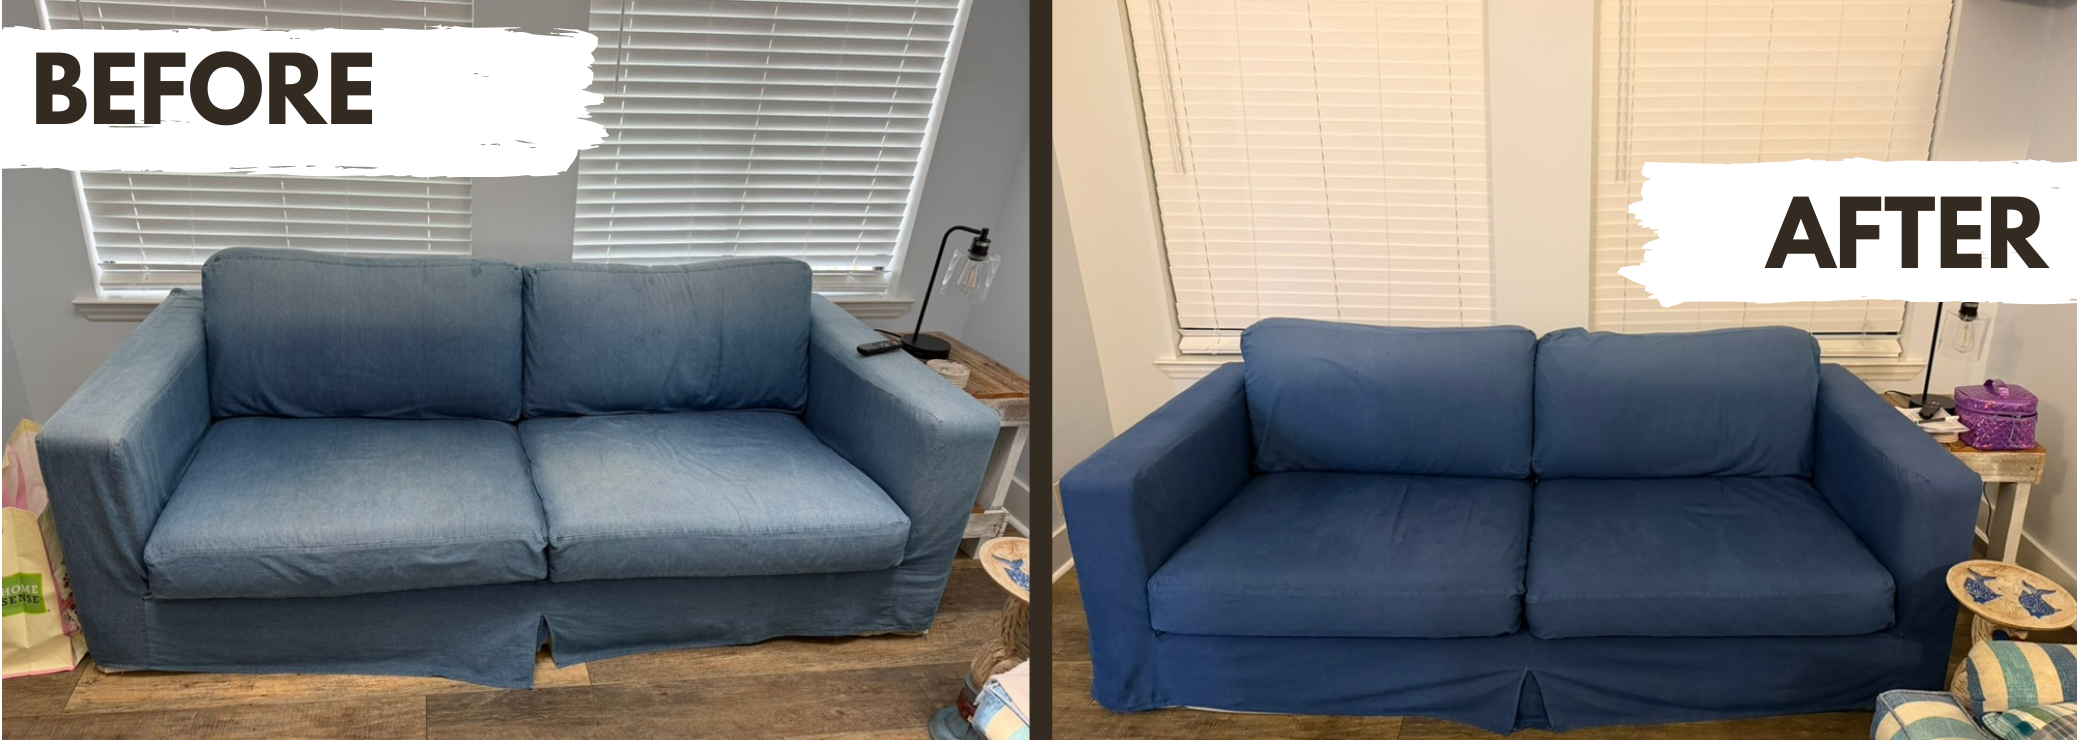
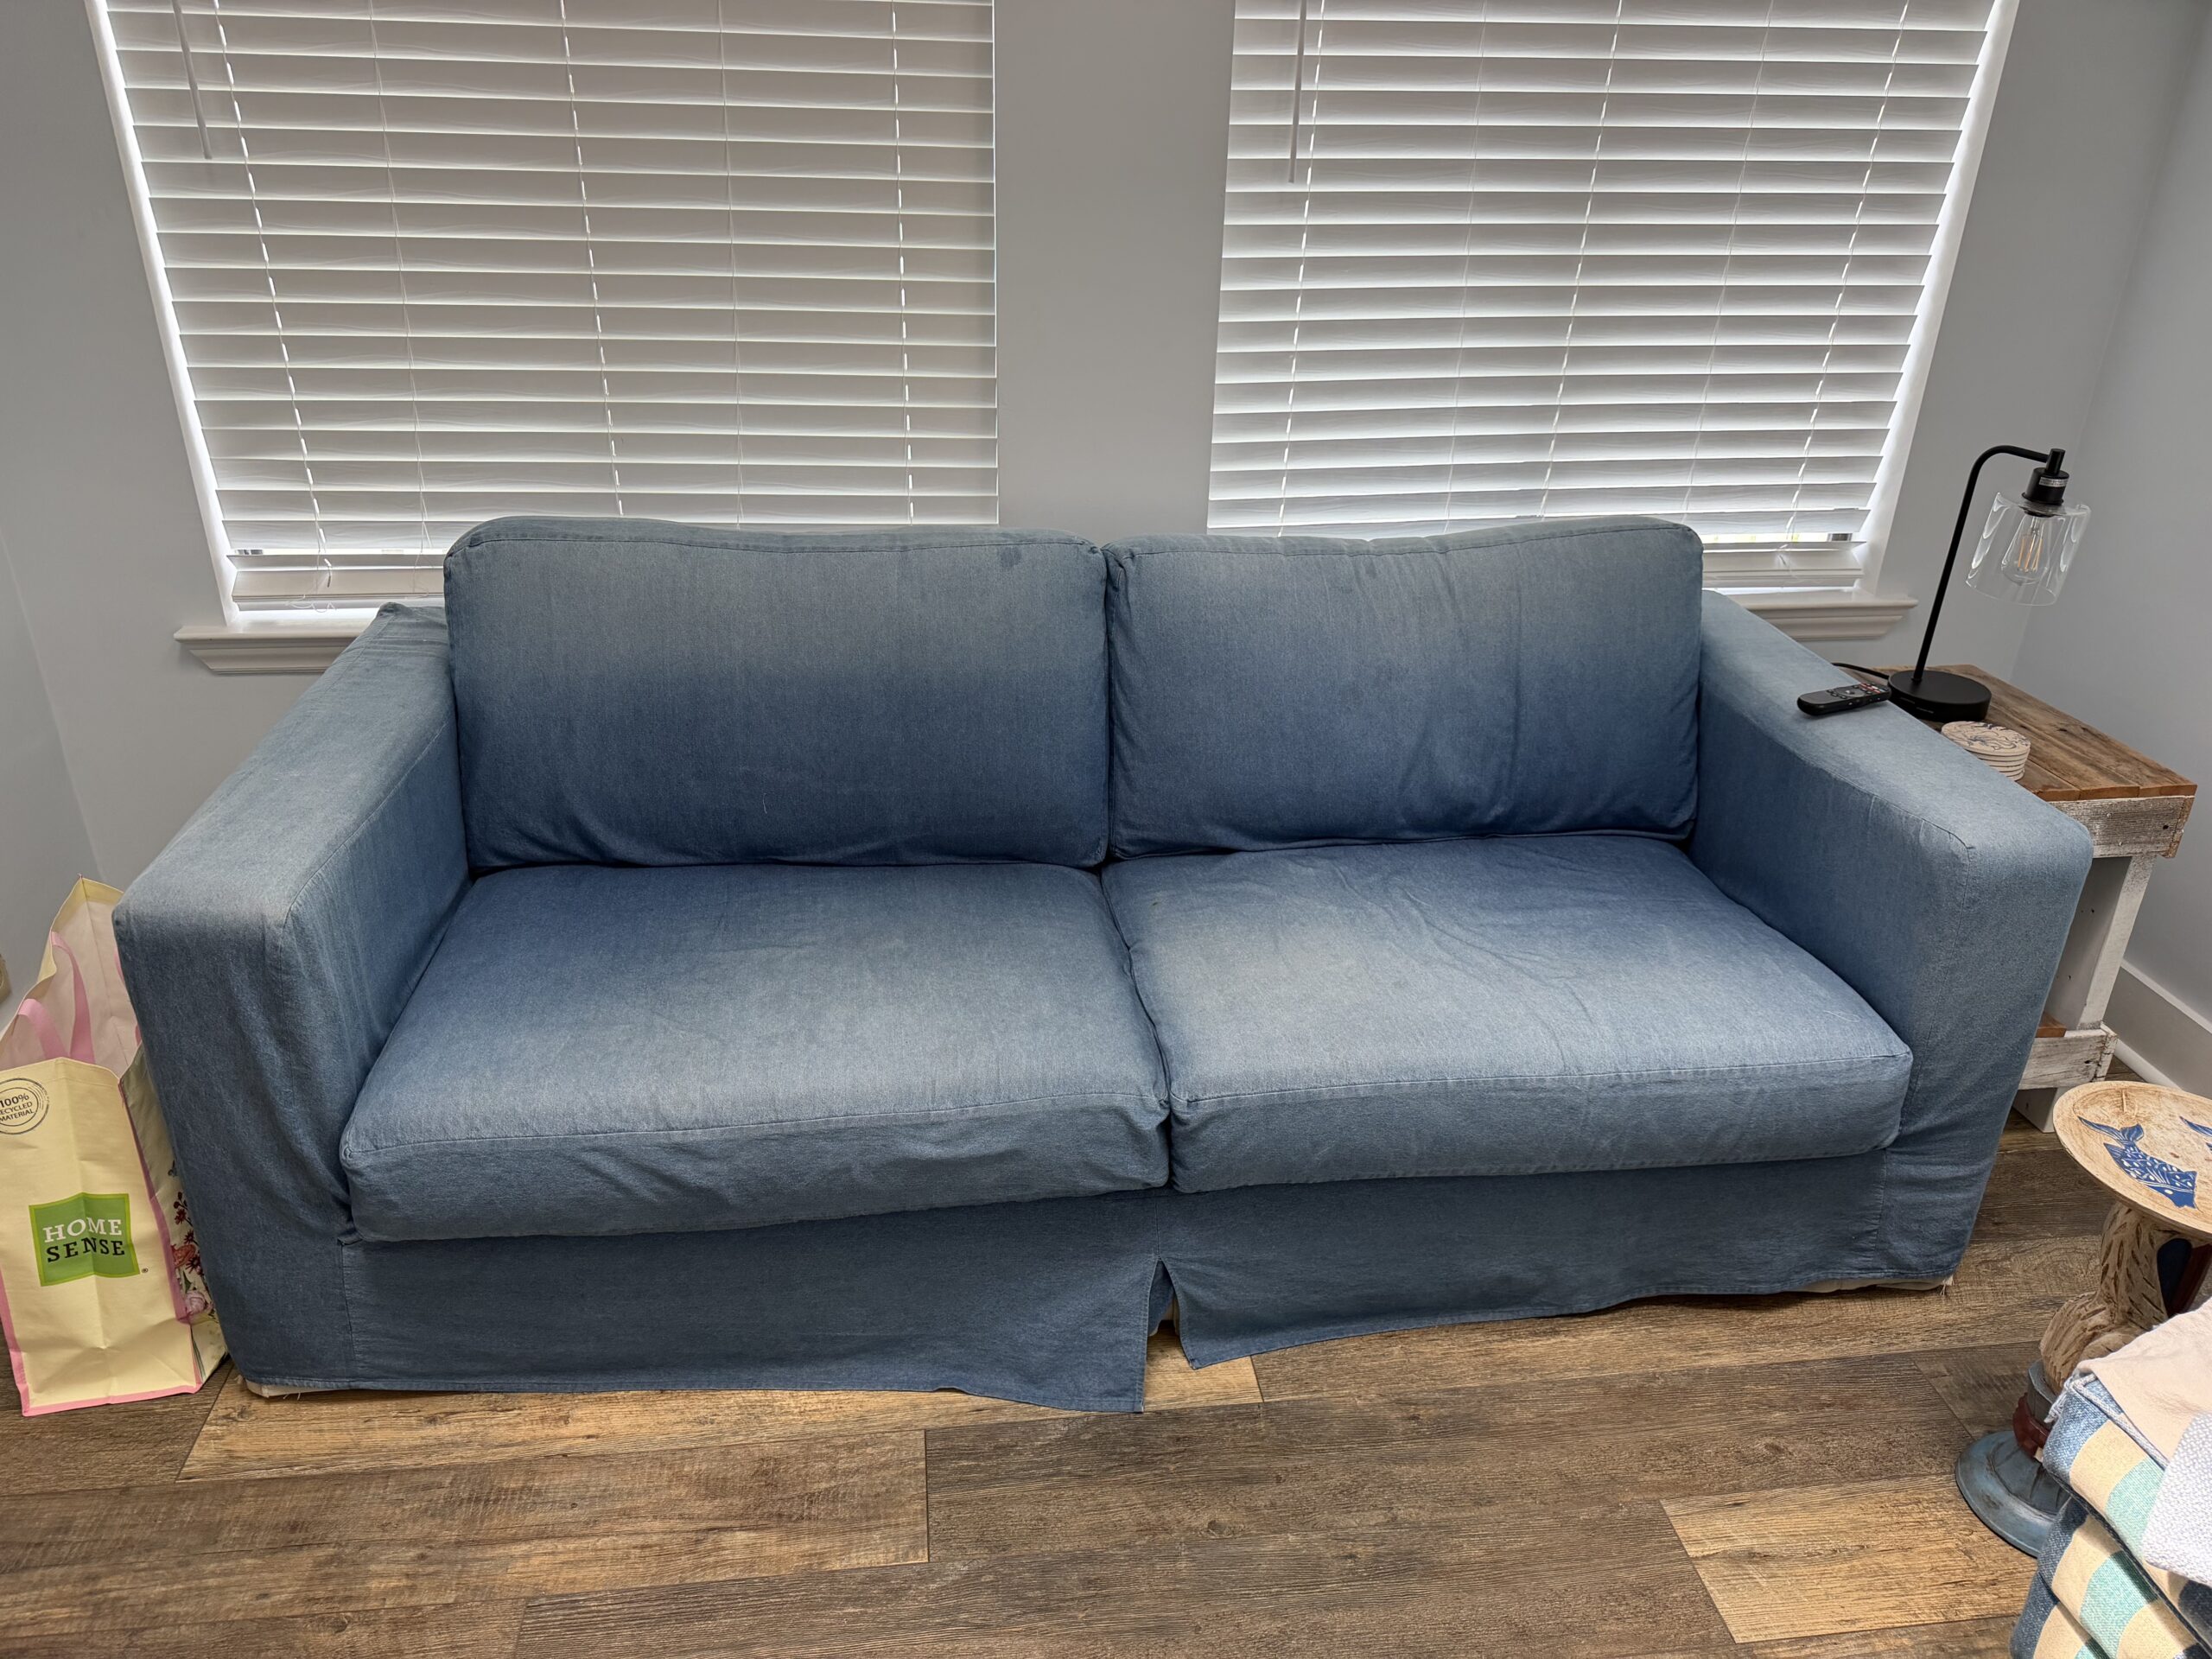
There was just one problem: after about five years of washing, wear, and plenty of bright coastal sunlight, the blue denim had faded. A lot.
Why I Decided to Dye the Slipcover
The fabric itself was still in perfectly good condition, so replacing the slipcover seemed unnecessary. Instead, I decided to see if I could bring the blue back by over-dyeing the existing denim with Rit All-Purpose Liquid Dye in Denim Blue.
And it worked surprisingly well.
Dyeing a Large Slipcover Without a Giant Container
The biggest challenge wasn’t actually the dyeing. It was figuring out how to dye that much heavy denim at one time.
Fortunately, the kitchen at the island house has a very large stainless steel sink. It turned out to be just about perfect for the job.
Rather than trying to fit the entire slipcover into one dye bath, I divided it into three batches:
- The two bottom seat cushion covers
- The two back cushion covers
- The large base slipcover that fits over the couch frame
I dyed the seat cushion covers first, then the back cushions, and finally the large base cover.
What I Used
For this project, I used:
- Rit All-Purpose Liquid Dye in Denim Blue
- Table salt
- Rubber kitchen gloves
- A kitchen apron
- A silicone cooking spoon
- A large plastic garbage bag
- Laundry detergent
- A large stainless steel sink
For the first batch, I used about 3/4 of a bottle of Rit Denim Blue and one cup of salt. I kept the same dye bath for the next two batches, adding more hot water, dye, and salt each time.
The salt helps the dye work with cotton fabrics, like my denim slipcover, and helps bring the color back.
Because fabric dye can stain surrounding surfaces, I spread a large plastic garbage bag on the floor beneath the sink before starting. A cheap plastic painter’s drop cloth would work just as well. It also gave me a safe place to put the dripping fabric before moving it to the washing machine.
Step 1: Prepare the Dye Bath
Once everything arrived, I watched a YouTube video on replacing window screen mesh. It looked simple enough. Pop the screen out, swap the mesh, done.
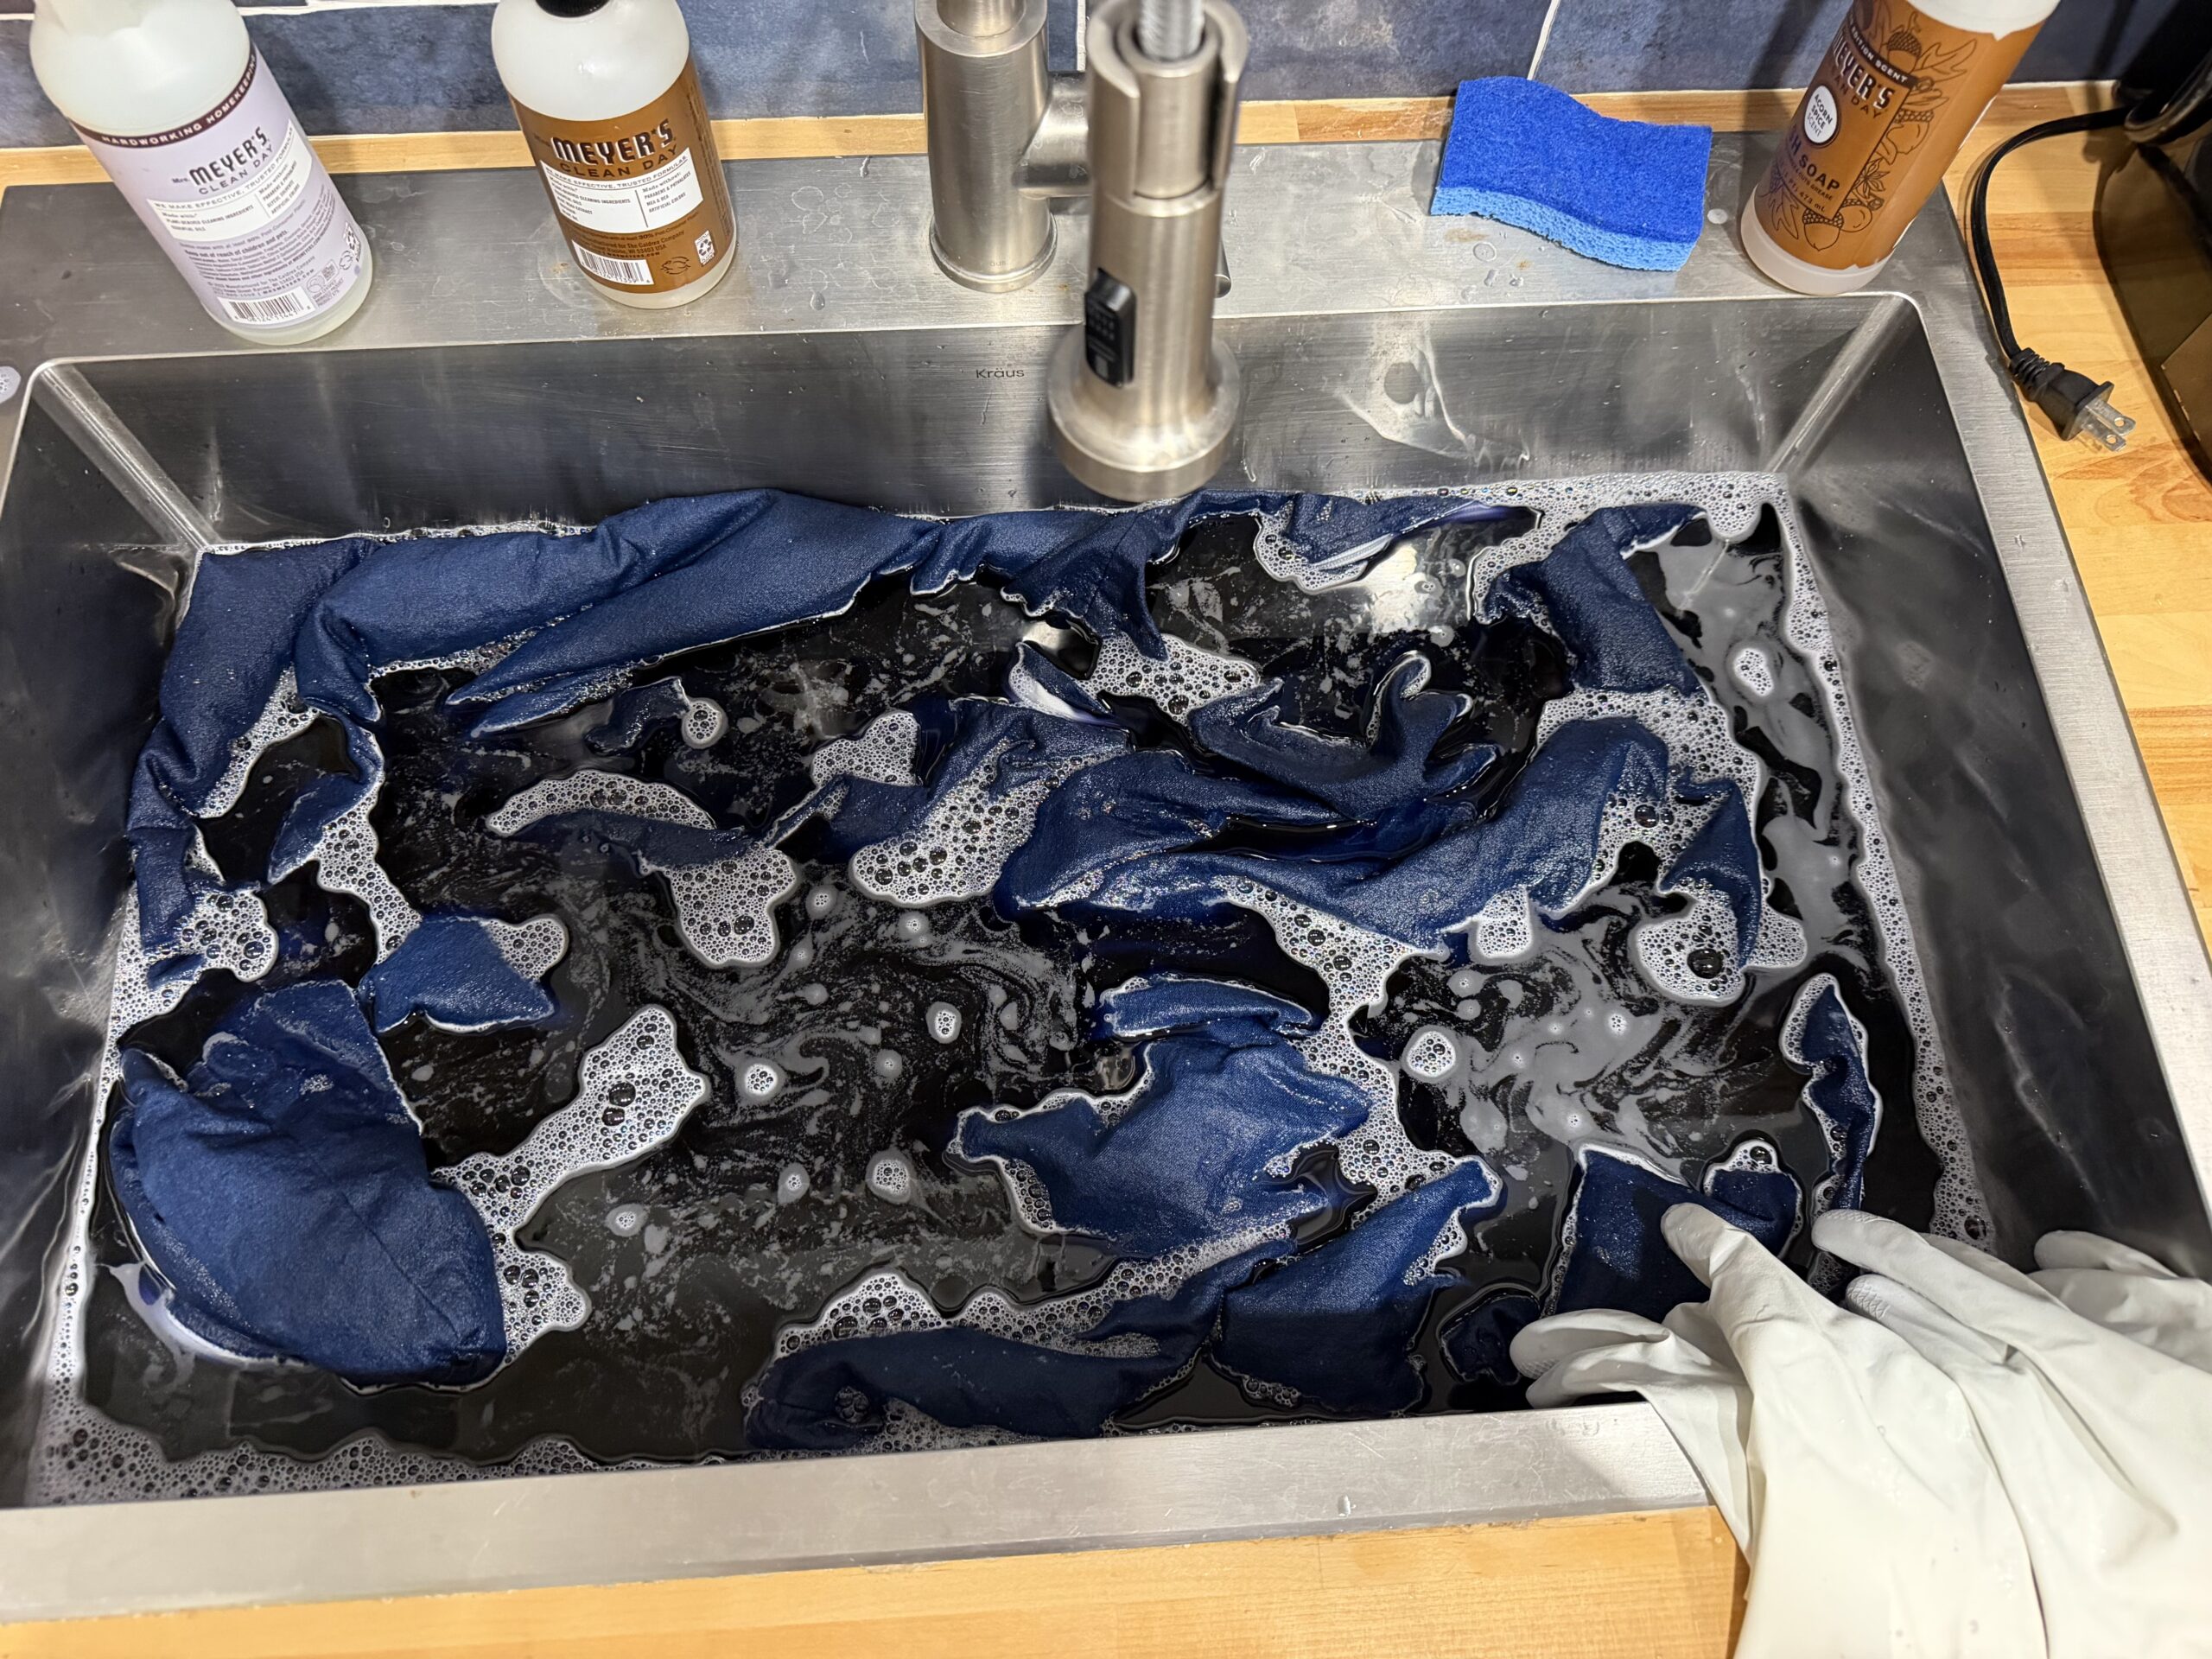
I filled the sink with the hottest water available from the faucet.
For my first batch — the two bottom cushion covers — I added about 3/4 of a bottle of dye along with about one cup of salt and mixed everything thoroughly.
Then the cushion covers went into the dye bath.
Step 2: Keep the Fabric Moving
This was probably the most important part of the entire process.
I left each batch in the dye bath for approximately 20 minutes, but I didn’t just drop the fabric in and walk away.
I stirred and moved the denim continuously with a silicone cooking spoon, while repeatedly pushing any fabric that floated above the surface back underneath the dye bath.
With something as large and heavy as a slipcover, there are lots of folds where fabric can bunch together. Keeping everything moving helps the dye reach the fabric more evenly and reduces the chance of ending up with noticeably lighter or darker areas.
Yes, standing over the sink stirring a couch for 20 minutes is every bit as glamorous as it sounds.
Step 3: Refresh the Dye Bath Between Batches
I didn’t drain the sink after the first batch. Instead, I removed the dyed cushion covers and kept the existing dye bath for the next round. Before adding the back cushion covers, I topped it off with more hot water and added additional dye and salt.
I repeated the process again before dyeing the large base cover.
For each batch, I followed the same basic routine: about 20 minutes in the dye bath with plenty of stirring, turning and poking to keep all of the fabric submerged.
Step 4: Get the Wet Slipcovers to the Washing Machine — Carefully
This part deserves its own step because freshly dyed, soaking-wet denim can make an impressive mess very quickly.
After removing each piece from the dye bath, I squeezed out as much liquid as possible while it was still over the sink.
Then I placed the wet fabric directly onto the plastic garbage bag I’d spread on the floor.
I pulled the sides of the bag up and around the wet fabric, essentially making a temporary waterproof bundle. That allowed me to carry the dyed slipcover to the washing machine without dripping blue dye through the house.
If any dye did splash or drip onto another surface, I wiped it up immediately.
Step 5: Wash and Dry
Each batch went directly into the washing machine.
I ran a full wash cycle with warm water and a small amount of laundry detergent, then dried the slipcover pieces normally in the dryer.
Once everything was completely dry, all that was left was putting the slipcover back onto the couch.
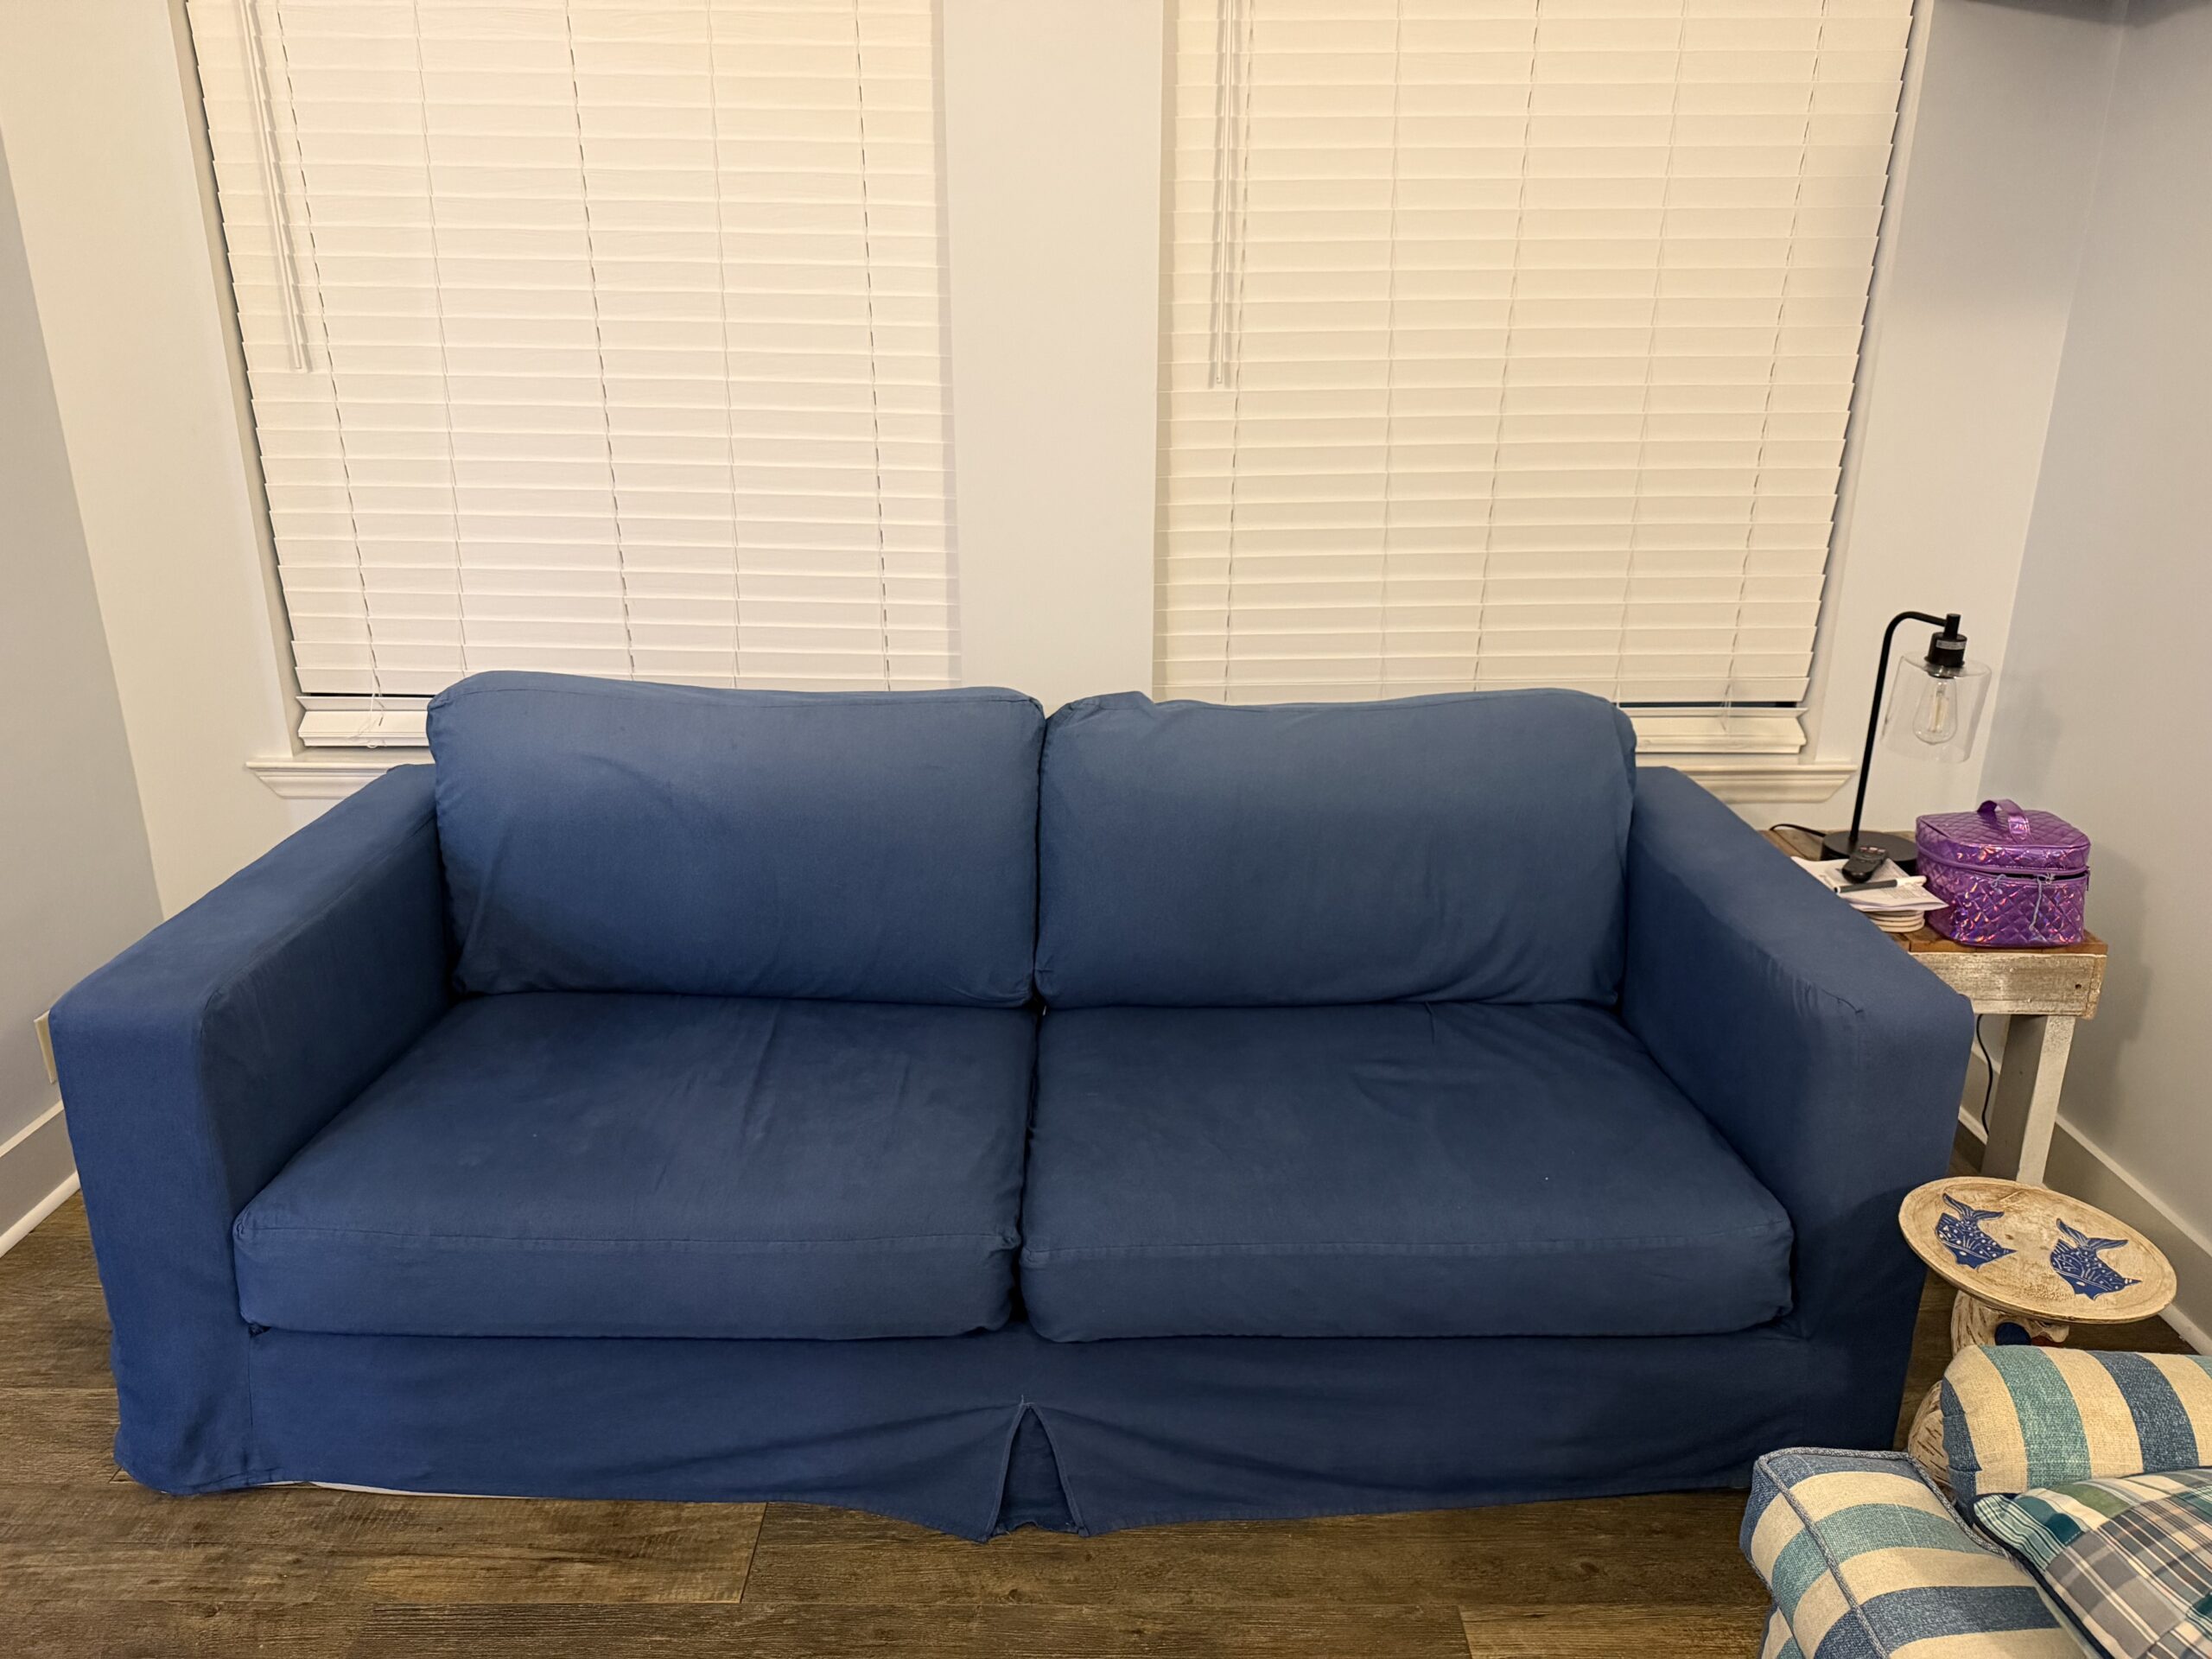
And this was the result:
A Much Better Blue — Without Making a New Slipcover
The difference was even better than I’d hoped.
The denim went from a washed-out, faded blue back to a rich navy that looks much closer to the way the slipcover looked when I originally made it. More importantly, I didn’t have to buy yards of new denim and make an entirely new couch slipcover just because the color had faded.
For a piece of furniture that lives in a vacation rental — and occasionally doubles as a very large dog bed — that’s a win.
Would I do it again? Absolutely.
The process was a little messy and required some patience, particularly keeping all that heavy fabric moving in the dye bath. But compared with sewing another complete slipcover, spending an afternoon stirring blue denim in the kitchen sink was an easy choice.
And the couch is now ready for another round of renters, beach sand, wet bathing suits and sandy dogs.
A Few Things I Learned
A few things became pretty clear once I was up to my elbows in blue dye:
Break a big project into manageable pieces. Dividing the slipcover into three batches made it much easier to keep the fabric submerged and get more even results.
Keep the fabric moving. Heavy, wet denim folds over on itself and wants to float, so constant stirring, turning, and pushing the fabric below the surface was probably the most important part of the process.
Protect everything nearby. Freshly dyed denim holds an astonishing amount of blue water. The plastic garbage bag on the floor made moving each batch to the washing machine much less stressful. A cheap painter’s tarp would give you even more protection.
Have the washing machine ready. Once each batch came out of the dye bath, I wanted to get it contained and into the washer as quickly as possible rather than carrying dripping blue fabric around the house.
Faded doesn’t necessarily mean worn out. The denim itself was still in great condition — it had simply lost its color. An afternoon of work and some fabric dye gave the slipcover a new life and saved me from making an entirely new one.
And one final discovery: wet denim is ridiculously heavy. By the end, I felt like I’d restored a couch and gotten a workout at the same time.
Before and After
Not bad for a five-year-old slipcover, a few bottles of dye, and an afternoon spent stirring a couch in the kitchen sink.