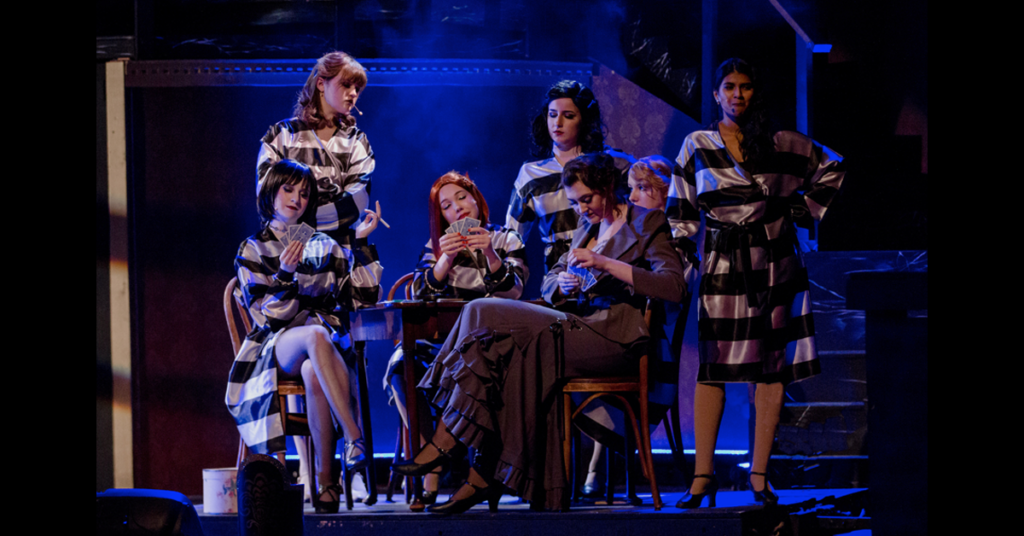
Making “Jail” Robes – Chicago
The show “Chicago” centers around the female inmates of the Cook County jail. Traditional costuming for some versions of this show have the actors playing inmates in a dressing robe that looks somewhat like prison garb. The Director I was working with liked the inmate robes that were used by the Drury Lane Theatre in their 2017 production (see below). Black and white striped robes were not available for purchase, so I made these costumes.
This video clip from Drury Lane Theatre’s 2017 production of Chicago was our inspiration for the murderess jail robes
The Fabric
For these robes, I needed a black and white stripe satin that could be made into a flowy robe. I found a suitable striped fabric at Fabric.com. Amazon had acquired Fabric.com, and has since closed the company, but it appears that Amazon still offers this fabric. If this fabric is out of stock, there are several other similar suitable options available through Amazon.
I ordered 3⅓ yards of fabric for each of the robes (a total of 12 robes for 7 roles due to a decision by the director to double-cast several of the roles with actors of random sizes that couldn’t share costumes – but I digress. . . ) Even though satin fabric is notoriously hard to work with because it “crawls” when you try to sew a seam, this particular fabric wasn’t so bad. In my experience, cheaper satin fabric is easier to work with, because it has a bit of a stiffer “hand”.
When this fabric arrived there were two issues: (1) the fabric was stiffer than I wanted, because I wanted the robes to be flow with the actors’ movement, and (2) the white stripes were too bright, making the look too “clean” for a prison uniform. So, before I cut out the robes, first I washed, dried, and ironed the entire fabric yardage, and then I over-dyed the fabric with in RIT Liquid Dye in Taupe. I used 2 bottles of dye for the 40 yards of fabric, and followed the directions on the RIT website. Because of the high polyester content of the fabric, the dye doesn’t really “take”, which leaves a mottled dull appearance – EXACTLY the look I was going for. (Okay, it was a lucky accident, but hey, it worked, so, yeah, win.)
The Pattern
When selecting a pattern for the robes, I looked for the absolute simplest one that I could find, since I had to make 12 (ugh) of these things. This meant finding a simple belted robe with no lapels to construct. I ended up using Simplicity 1946. Because the local Joann’s store has frequent sales on patterns (look at their weekly online sale brochure to find out the timing on these sales), I usually buy several copies of the pattern (usually for $1 or $2 each) and cut one for each of the sizes I need. Because the robes are belted (and don’t need to fit closely), for this project I only used one Small and one Medium pattern. For the smallest girls, I made a Small (which is still pretty large in this pattern), and for all of the rest I made a Medium. The actors ranged from 5’0” to 6’1”, and the two sizes worked for all of them.
Construction
After cutting out (with the stripes horizontal) and sewing the robes, I made belts out of solid black satin fabric and attached them at the center back waist. I also made the neck and front facings out of a stiff off-white cotton fabric, to add “body” to the robe front, and to make it hang correctly.
I also added a small piece of velcro to fasten the robes together above the bust and at the waist. This kept the robe closed onstage, even if the belt slipped. This was important because the robes were worn onstage over other costumes that weren’t revealed until later.
To keep the sleeves from flopping too much, or falling when the actresses lifted their arms, I added a knit cuff to the robe sleeves. To do this, I cut 5″ x 11″ strips from black stretch ribbed fabric. I folded each piece with the short ends together, and sewed a seam across the edge through both pieces. I then folded the resulting fabric circle over like a donut, with the seam on the inside of the folded piece, to make a cuff. I sewed this piece to the bottom edge of the sleeve, stretching the cuff to fit. Alternatively, to save time, you could buy circular cuff fabric and attach to the end of the sleeves. More detailed instructions for cuffing a sleeve can be found here..


