IKEA Emmie Roll-up Blind DIY
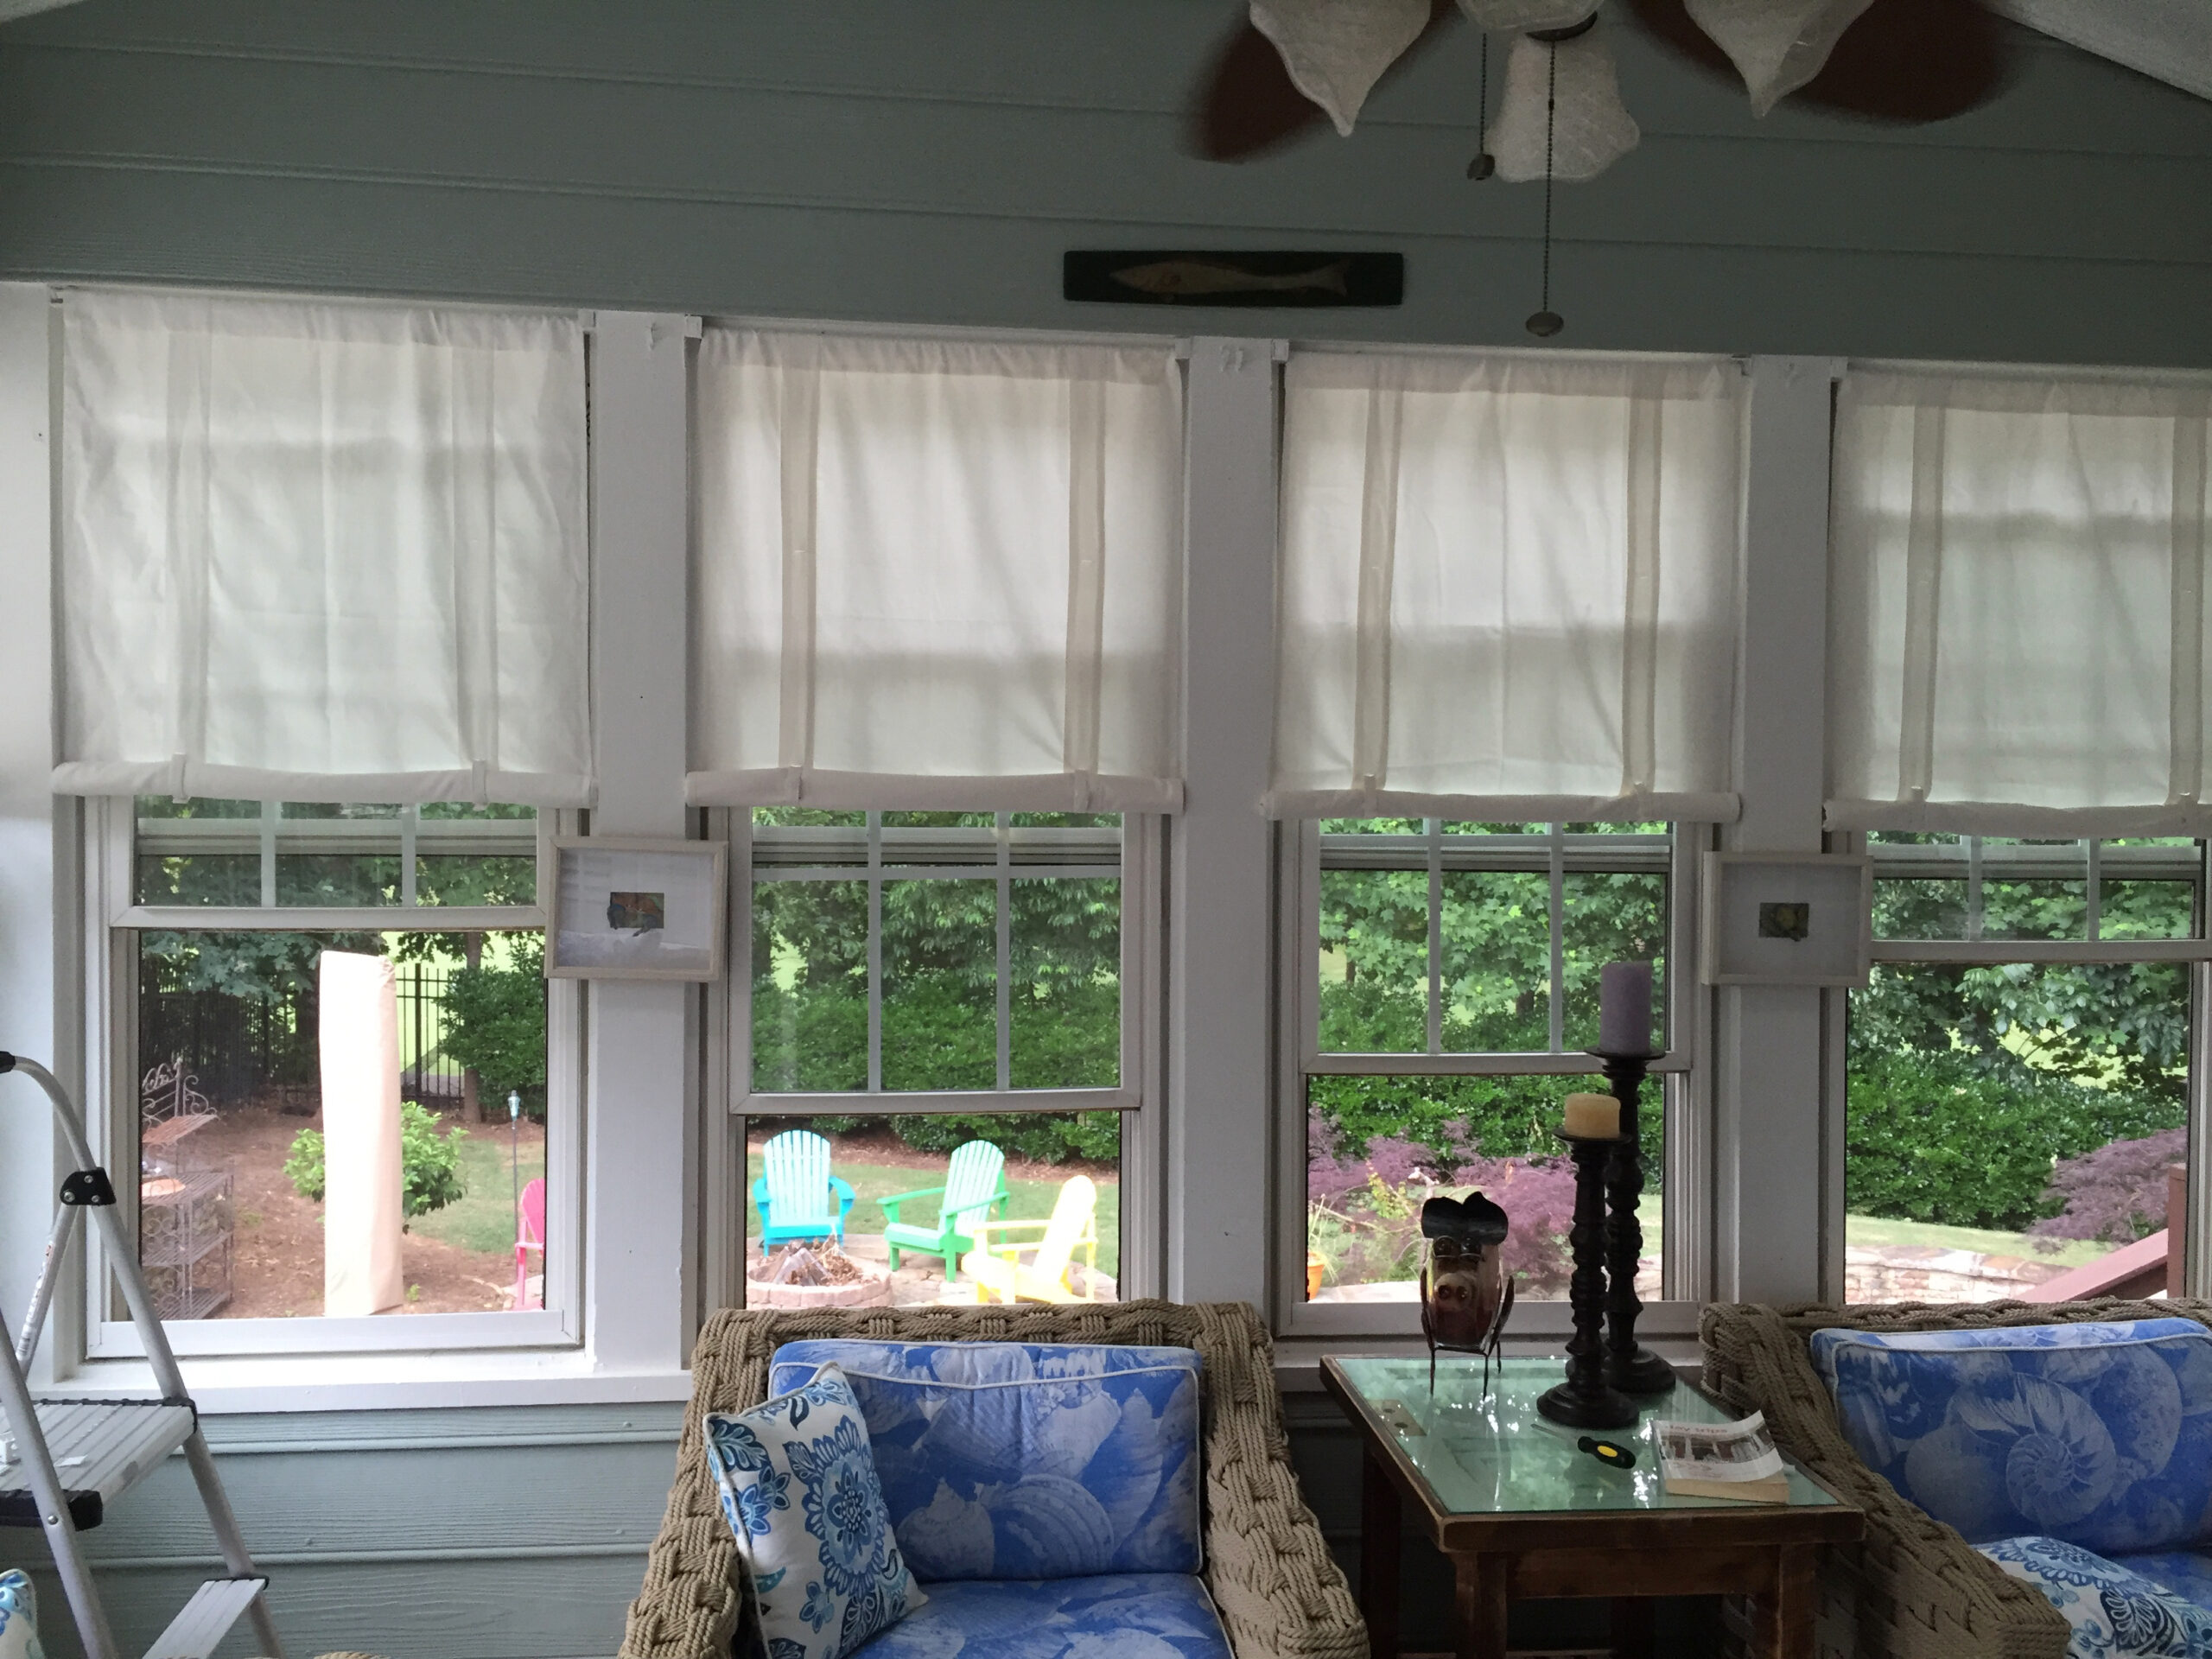
When we bought our house in July, 2014, we found window treatments for our newly renovated sunroom. We were looking for a beach feel, and discovered that the Ikea Emmie blind was the perfect find, and that the 31.5″ size would perfectly fit our sunroom windows. One problem – we soon discovered that, for some reason, Ikea had discontinued this popular item. We did find that a handful were still available from sources like eBay and Amazon, but each source only had one or two available and we needed blinds for 11 windows. Also, because of the scarcity of this product, the price on these sites was greatly inflated. So there was only one thing to do – find a way to make them. Here is how I recreated these blinds.
Ikea Merete curtains are made with the same fabric as the Emmie blind, so I started with these curtains. The cost is $29.99 for each pair of curtains, and it is possible to make one complete blind from each curtain. I used the 57″ x 98″ sized curtains, but other sizes are available.
Cutting Instructions
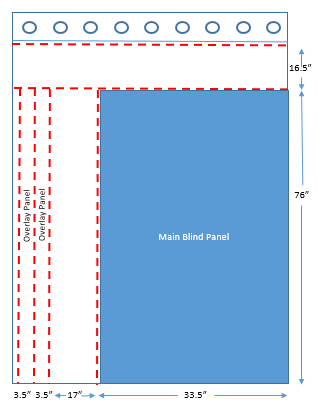
To make each blind, you will need a 76″ x 33.5″ piece of fabric. Here is an easy way to cut a curtain down to this size: (See corresponding red cutting lines on the diagram below)
- Cut off the ring panel at the top of the curtain close to the seam
- Cut another 16.5″ off of the new raw edge
- Cut the hem from left edge of the remaining panel, cutting close to stitching
- Cut 2 3.5″ strips from the left edge of the panel.
- Save these strips to use as the overlay panel on the blind
- Cut another 17″ from the left raw edge
- The remaining panel should measure 33.5″ x 76″
Constructing the panels
- Cut each of the 3.5″ x 76″ Overlay Panels to 45″ long, so each is now 3.5″ x 45″ long
- Discard the 2 remaining 3.5″ x 31″ pieces
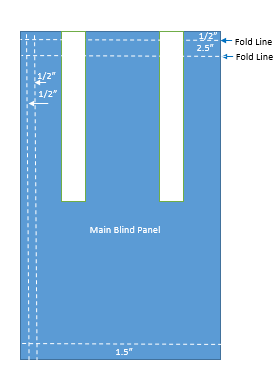
- Press under 1/2″ on the two long sides and on one short side of each Overlay Panel
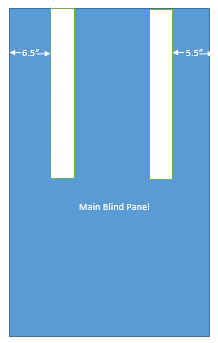
- Sew Overlay Panels to Main Blind Panel, with the folded side against the Main Blind Panel. Align the unfolded short edge of the Overlay Panels with the top edge of the Main Blind Panel. Place the left Overlay Panel 6.5″ from the unhemmed left edge of the Main Blind Panel, and Place the right Overlay Panel 5.5″ from the hemmed right edge of the Main Blind Panel.
Hemming and Rod Pocket
- On unhemmed left side of Main Blind Panel press under 1/2″ hem, turn again and press. Stitch hem in place close to inside folded edge. Finished edge should match existing hem on right side of Main Blind Panel.
- To construct curtain rod pocket at top of Main Blind Panel, press under 1/2″ along raw edge, then turn in again by 2.5″ and press. Sew pocket in place.
- In addition to the existing hem, turn in an additional 1.5″ on the bottom of the Main Blind Panel to make the bottom rod pocket.
- Sew across the left edge of the bottom rod pocket to prevent the rod from slipping out, once inserted.
Buttonholes
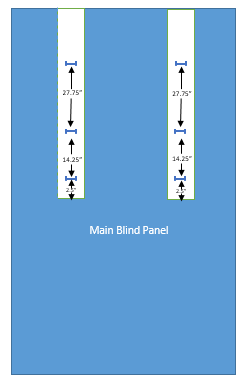
- Sew 3 3/4″ button holes on each Overlay Panel, through all layers. All button holes should begin 3/4″ from the left side of the Overlay Panel, and should be placed in these positions:
- 2.5″ from bottom of Overlay Panel
- 14.25″ from button hole (a)
- 27.25″ from button hole (b)
Finishing
- Cut a 1″ dowel rod 31.5″ long and insert into the bottom pocket
- Using the piece cut in step #3 under “Cutting Instructions”, cut two 10.5″ strips. Make 1/2″ hems (turned twice) on both ends of each strip. Attach a 1/2″ x 1/2″ sew-on velcro “hook” square to one end of each piece and a 1/2″ x 1/2″ sew-on velcro “loop” square to the other end, on the opposite side of the strip. Feed these through one buttonhole in each strip.
- Roll blind from bottom and secure with Velcro-ed tabs.
- Purchase 32″ suspension café curtain rods, insert through top pocket, and hang blind.
Finished Project
